- http://www.npg.org.uk/
- http://www.vam.ac.uk/
- https://images.nationalarchives.gov.uk/assetbank-nationalarchives/action/viewHome
- http://www.nationalarchives.gov.uk/
- http://www.nottinghamshire.gov.uk/learning/history/archives/
- http://www.bbc.co.uk/archive/
- http://www.metmuseum.org/toah/hd/eudr/hd_eudr.htm
- http://www.britishmuseum.org
- http://www.theblandfordfashionmuseum.com/public/index.php
- http://www.manchestergalleries.org/our-other-venues/platt-hall-gallery-of-costume/
- http://www.museumofcostume.co.uk/collections/collection_search.aspx
- http://artrabbit.com/all/search/events?query=fashion&x=-1115&y=-13
- http://www.gettyimages.co.uk/editorialimages/archival#
- http://www.loc.gov/pictures/
- http://www.bl.uk/
- http://www.britishnewspaperarchive.co.uk/
- http://www.vam.ac.uk/content/articles/f/fashion-in-the-archive-of-art-and-design/
- http://www.britishpathe.com/workspaces/BritishPathe/The-Fashion-Archive
- http://www.vads.ac.uk/results.php?cmd=advsearch&words=london+college+of+fashion+college+archive&field=all&oper=or&words2=&field2=all&mode=boolean&submit=search&LCFCA=1

Chloe Roche; First year Design & Making Costume Student at Nottingham Trent Univerity
Wednesday 16 October 2013
Websites that could be used for my history of dress folder......
Thursday 10 October 2013
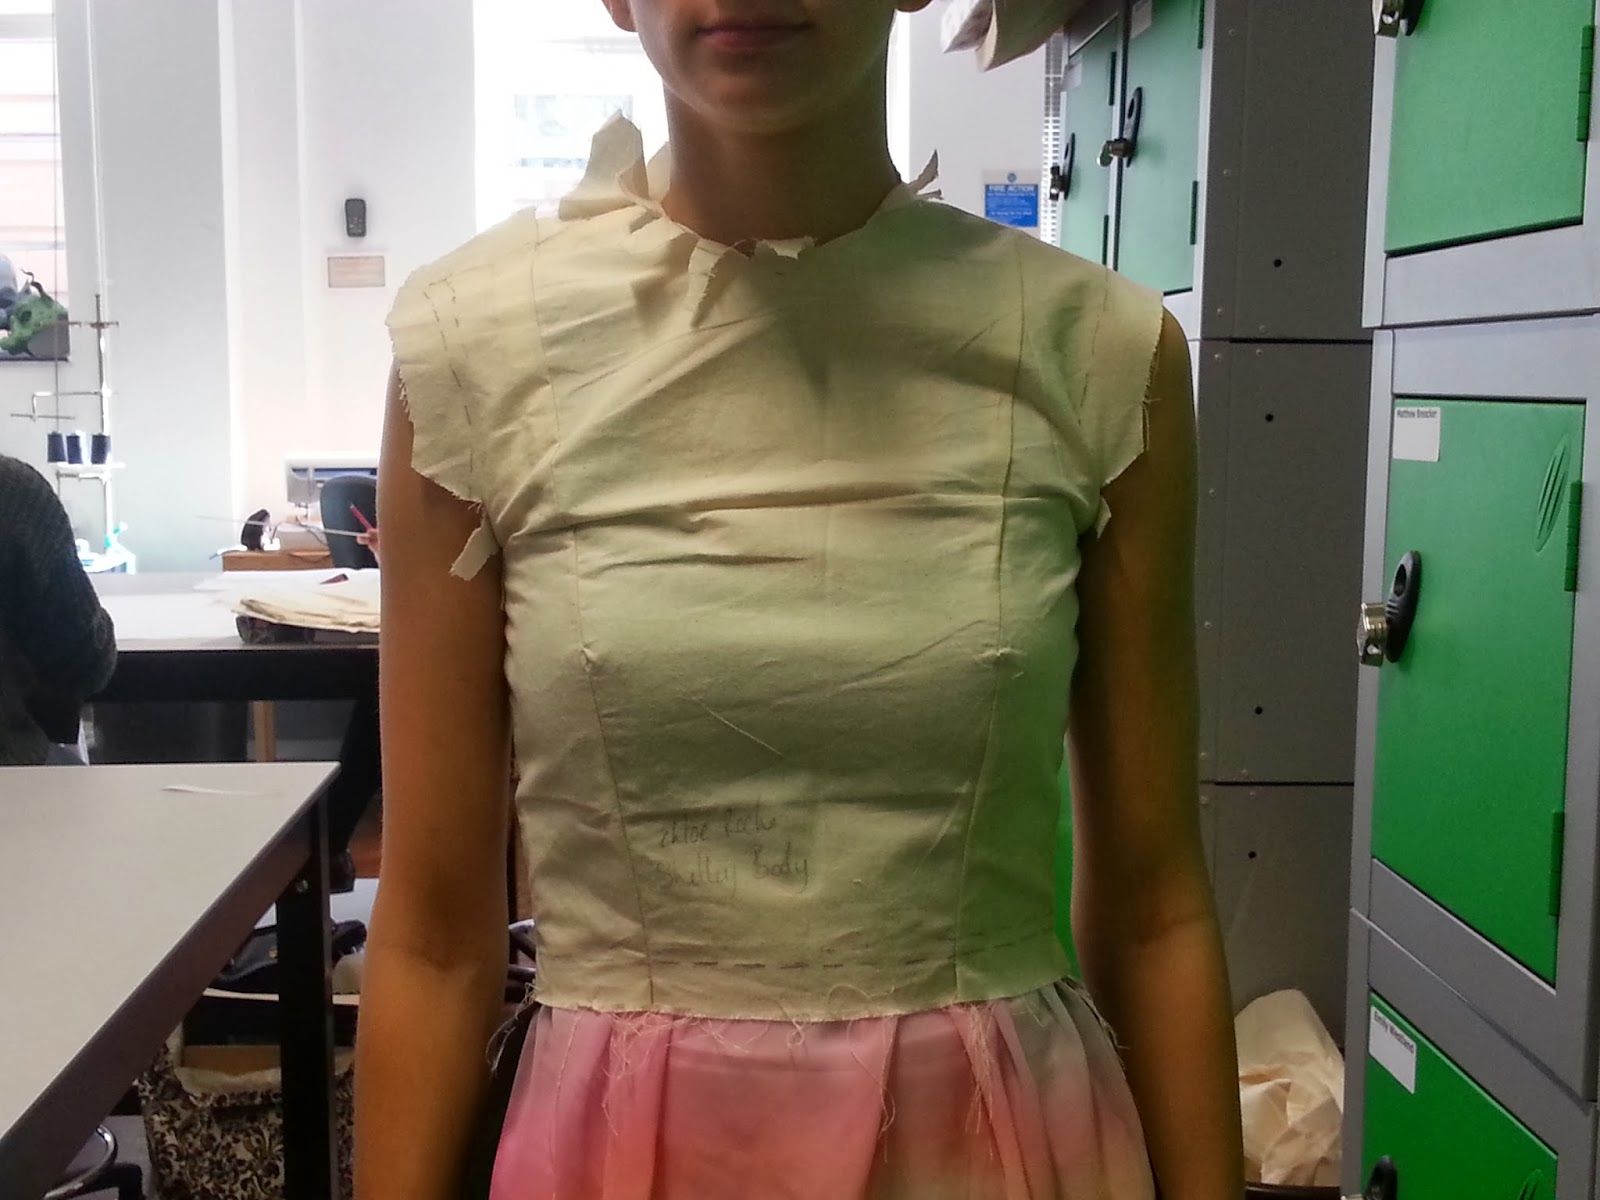
Second fitting
These show the fitting of the altered pattern using a toile.


This was made using the first pattern I did which wasn't right as the darts weren't in the right place or at the right angle going into the waist band. From altering the pattern to have the right darts got a much better result.7


It still needed to be a bit tighter around the waist and from looking at the original pattern the side seams were slightly curved so I just altered these on my pattern and took a bit more off the sides.
Pattern alteration
From the first fitting I was able to make an adapted basic block which I could he use to alter to get the pattern for the bodice. The show pictures show a few of the stages through the pattern alteration process.


 From the alterations of my toile I then went back to my pattern and made the same changes so that I was ready to cut out my final fabrics using it.

This was an example that we were shown by Mary to give us an idea of what it should look like and what stages we should go through to get to the final pattern.


This was the first pattern that I got to after making a toile using it I found that it wasn't right because of the placing of the darts. With this in mind I altered my toile accordingly so it followed the pattern of the original bodice and also it fit Shelley

Fisrt fitting photographs
These are the fitting photos for my basic block to make sure that it fit before altering it into the pattern for the final bodice.


 The only thing that was wrong with it was the seam for the shoulder was to far back causing around the neck to not fit very well.
 Through pulling the front of the shoulder up a bit more the seam around the neck matched up and I just had to alter the placing of the armhole and how much seam allowance is needed on it.


Friday 4 October 2013
Pattern alteration; Frankenstein bodice
I have worked in altering the pattern and creating it out of calico today, to make sure that my pattern pieces are all the right size.
 |
| First stage of the pattern altering. I used my basic block and then have taken out and altered the relevant darts and have also changed the neckline and the placement of the shoulder seam. |
 |
| Three different sections of the pattern so far |
 |
| Sections of the pattern pinned ready to be sewn together |
 |
| I have sewn all them sections together and this is the point that I am up to now. I am ready to transfer my pattern pieces onto the base fabric of my final piece. |
Frankenstein bodice
The first project we have a uni is to recreate a women's bodice for 1822 to fit one of the people out of are group. This is an example of the style of bodice that we are going to recreate.


Wednesday 2 October 2013
Basic pattern block; Frankenstein bodice
From the measurements that I took of Shelley I was bale to create a basic block. I then fitted it to her to make sure that my measurements were accurate. From this I will create the pattern pieces that I need to make the Frankenstein bodice.
 |
| First stage of drawing the basic block using the measurements that I had taken |
 |
| The pattern drawn for the second time as the first attempt wasn't quite right with the measurements. |
 |
| Cutting the pattern onto calico |
 |
| The full piece of fabric all marked and ready to be sewn. |
 |
| From the stages above I came out with this from fitting this to Shelley I found that the neck was sat a bit high and the shoulders also needed some alterations. From making this information on the fabric whilst doing the fitting I was then able to create another pattern with the alterations needed which would be used to make the bodice pattern. |
Subscribe to:
Posts (Atom)